Bánh Khoai Mì Nướng, Vietnamese cassava cake, is chewy, coconutty, and slightly crisp on the outside.
It’s a simple, nostalgic treat that takes me straight back to cozy afternoons in my grandma’s kitchen.
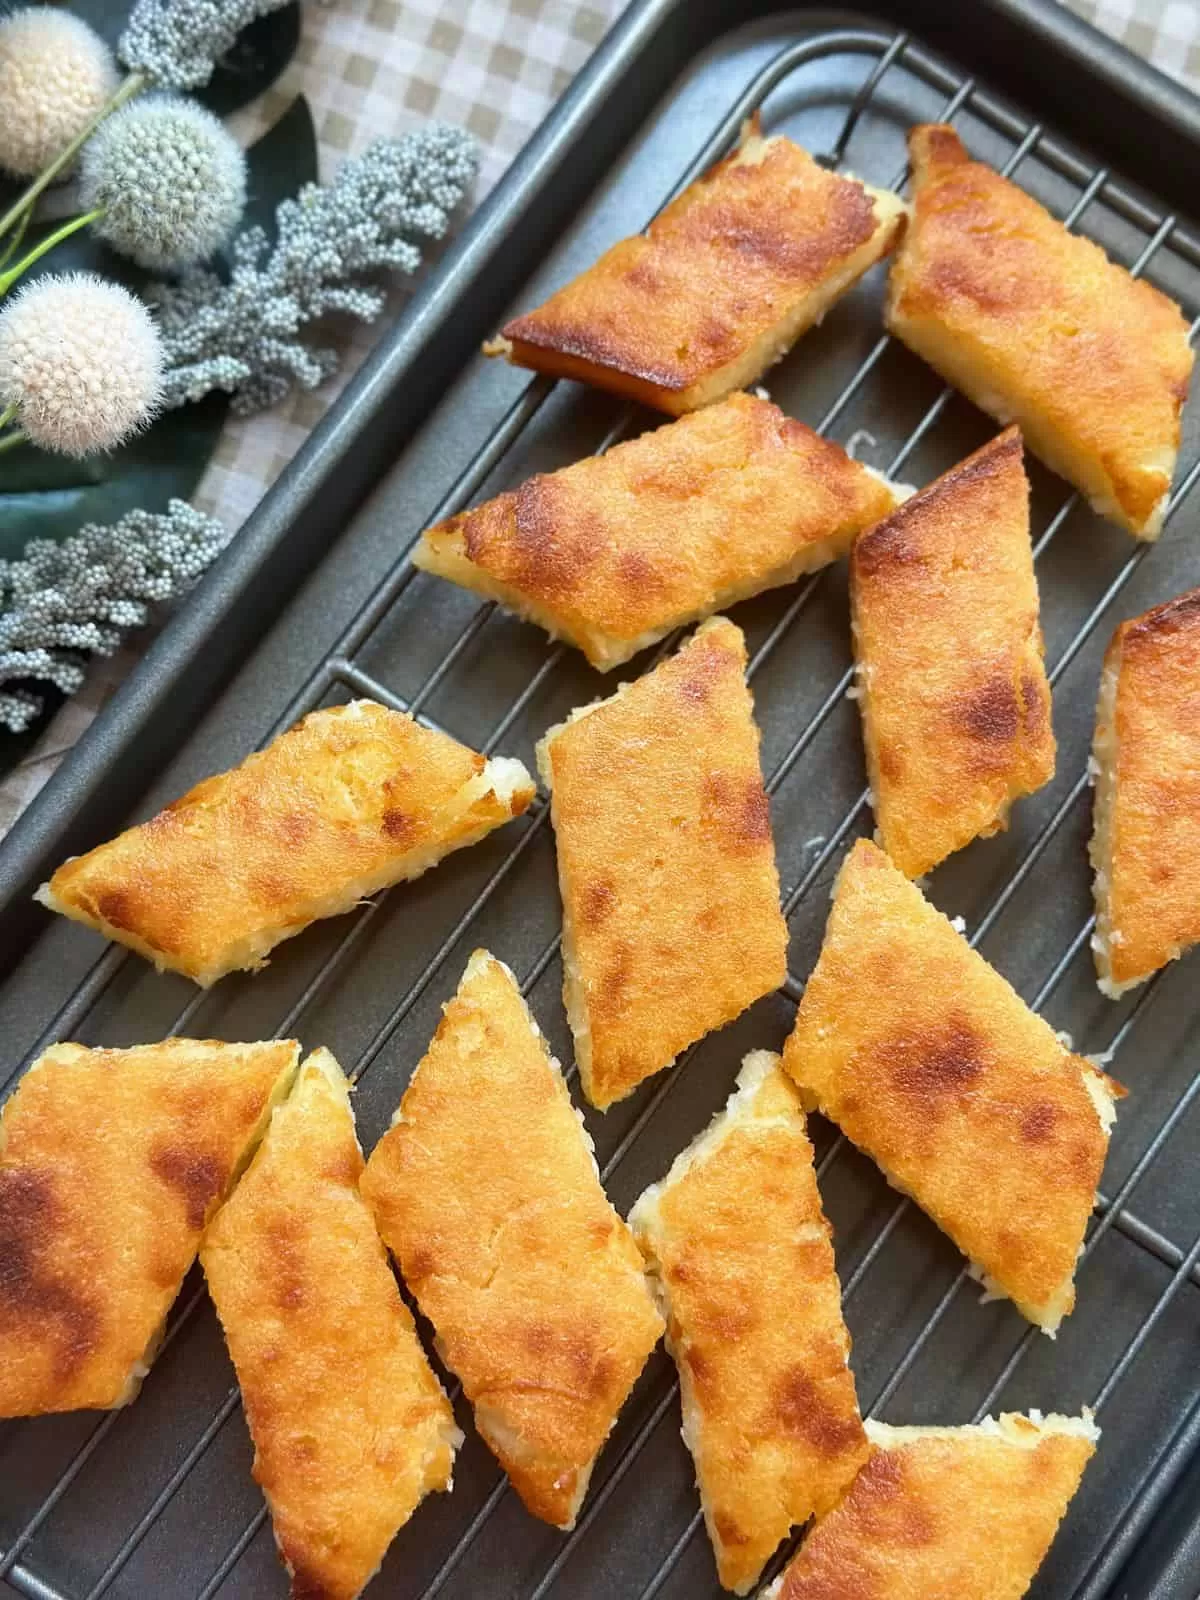
Bánh Khoai Mì Nướng (Vietnamese Cassava Cake)
Bánh Khoai Mì Nướng is one of those desserts that instantly brings me back home to the South.
Down there, especially in the Mekong Delta, people have a way of turning simple, local ingredients into the most heartwarming treats — coconut, lady finger bananas, pandan leaves, and cassava.

This cassava cake is pure comfort if you’re a coconut lover. If you’re into buttery, chewy sweets like Butter Mochi, I’m pretty sure this one will steal your heart too.
Traditionally, making Bánh Khoai Mì Nướng meant a full-on workout — peeling, grating, and squeezing fresh cassava by hand.
That’s why frozen grated cassava is a lifesaver — it tastes just as good, skips the hard labor, and still gives you all that sweet, coconutty goodness.
What is Cassava?

Cassava — or khoai mì as we call it in Vietnam — is one of those humble roots that show up everywhere, from family kitchens to street food stalls.
You might also hear it called “yuca” or “manioc.” It’s the very root that gives us tapioca starch, the magic behind chewy boba pearls, taro balls, and so many Asian desserts we love.
Just one small but important note: cassava should never be eaten raw. It naturally contains compounds that can be toxic if not cooked properly. But don’t worry — once it’s soaked and cooked through, it turns into something soft, cozy, and deeply satisfying.
If you’re curious about more staples like this, I’ve even written a full post about the most common Vietnamese vegetables you’ll run into — and how we use them in everyday cooking.
Ingredients

- Frozen Grated Cassava – This is the heart of the recipe. You can find it in most Asian or Mexican markets, and it saves you all the peeling and grating that fresh cassava usually requires.
- Sweetened Condensed Milk – Thick, creamy, and irresistibly sweet. It’s a staple in Vietnamese kitchens, showing up in everything from Vietnamese iced coffee and egg coffee to even savory dishes like Bun Thit Nuong (grilled pork rice noodle salad).
- Coconut Milk – For that creamy, tropical flavor that makes every bite taste like home.
- Vanilla Sugar or Vanilla Extract – Just a touch of vanilla lifts the entire flavor profile, making the cake even more fragrant and inviting.
- Tapioca Starch – This little addition helps bind everything together while keeping the cake’s signature chewy texture.
- Melted Butter – It’s all about that buttery richness that makes the cake feel extra indulgent.
- Shredded Coconut (Optional, but I’d never skip it!) – A handful of coconut meat adds lovely texture and an extra layer of coconut flavor that pairs so well with cassava.
- Salt – Just a pinch to balance the sweetness and bring all the flavors together.

Instructions
Step 1: Prepare the Batter
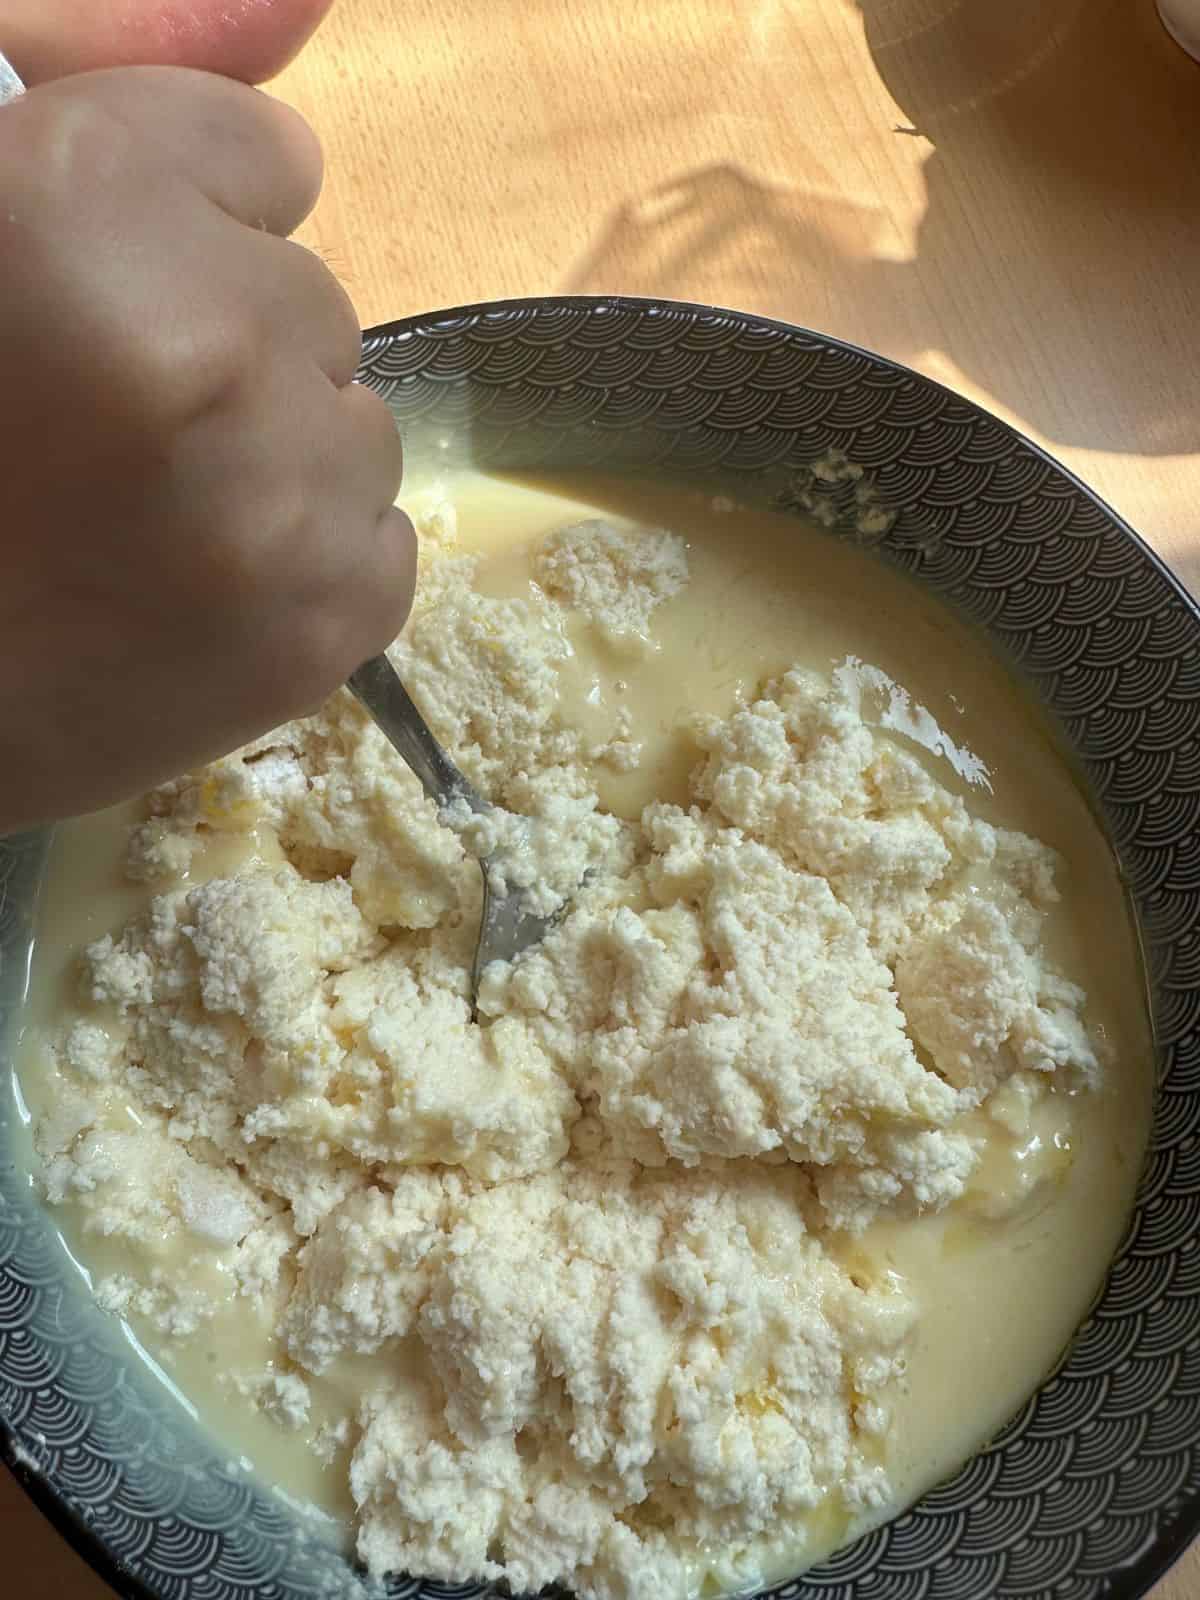
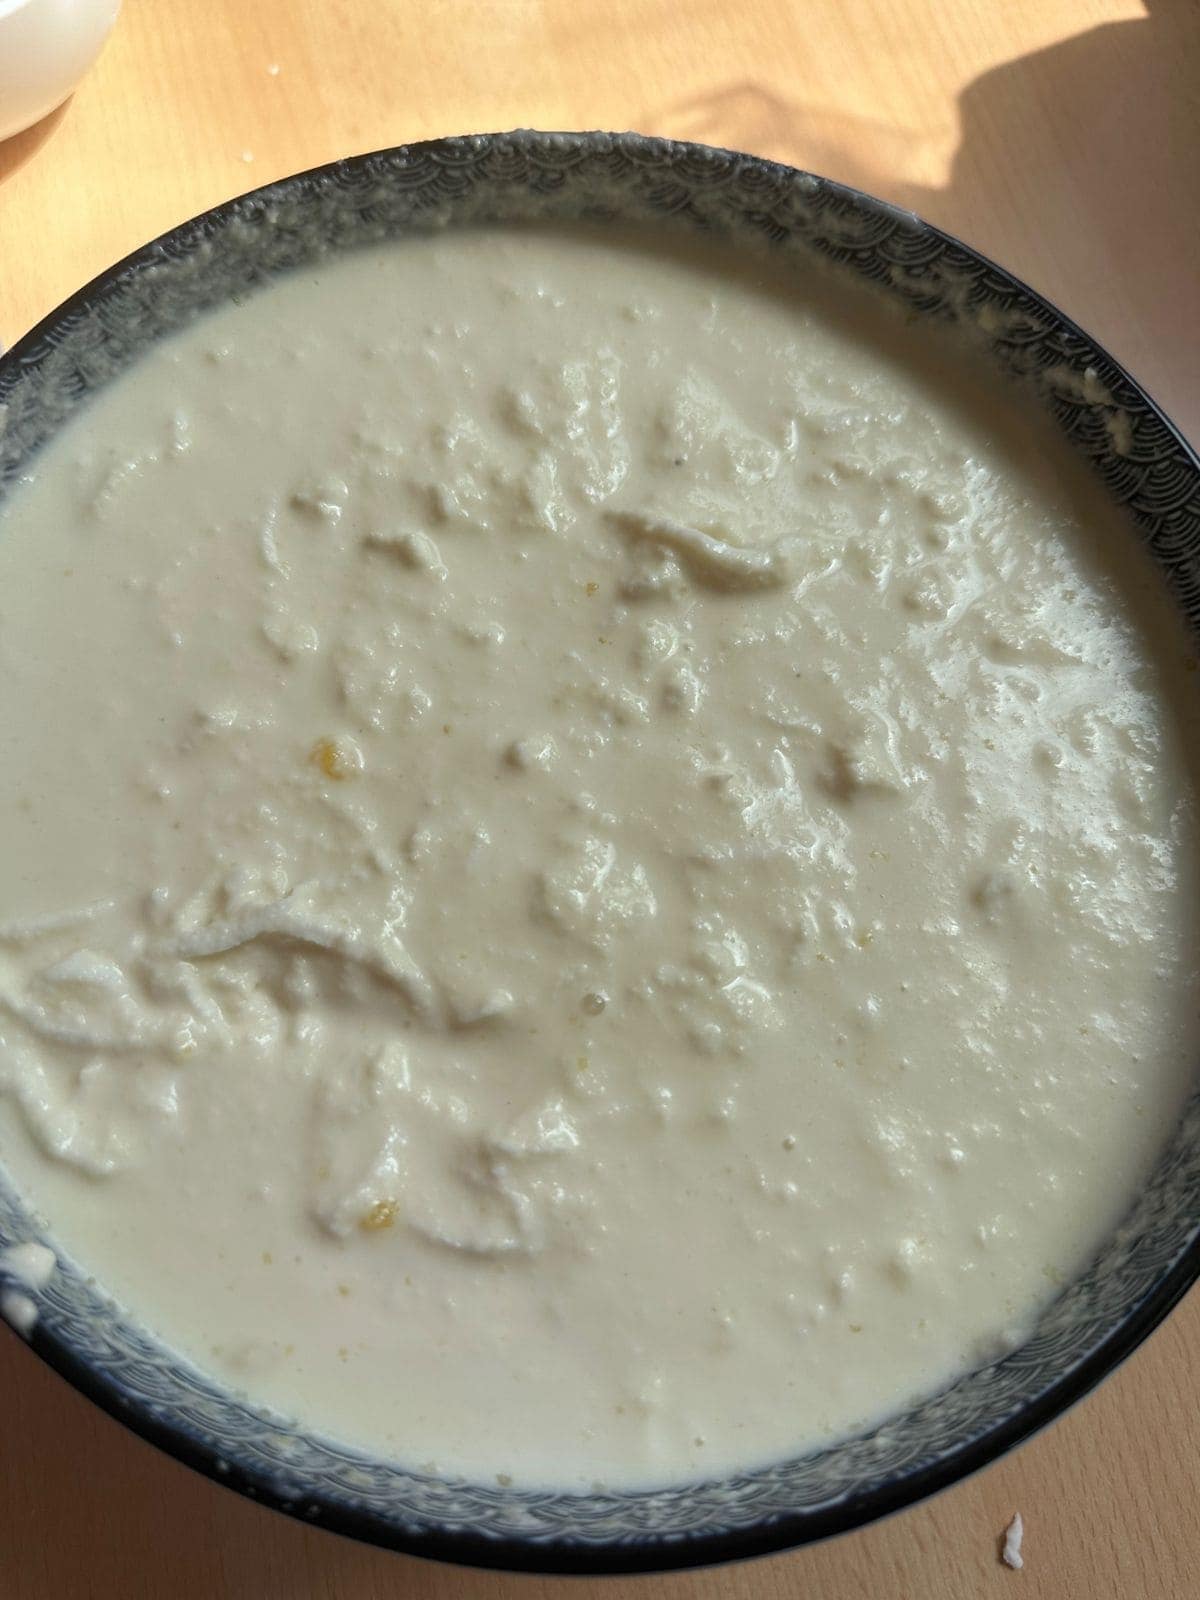
- Thaw the frozen cassava and squeeze out excess water if needed. In a large bowl, mix cassava, condensed milk, coconut milk, tapioca starch, melted butter, salt, and vanilla. Stir in shredded coconut.
- Let the batter rest for 15–30 minutes while preheating the oven to 375°F (190°C).
Step 2: Bake
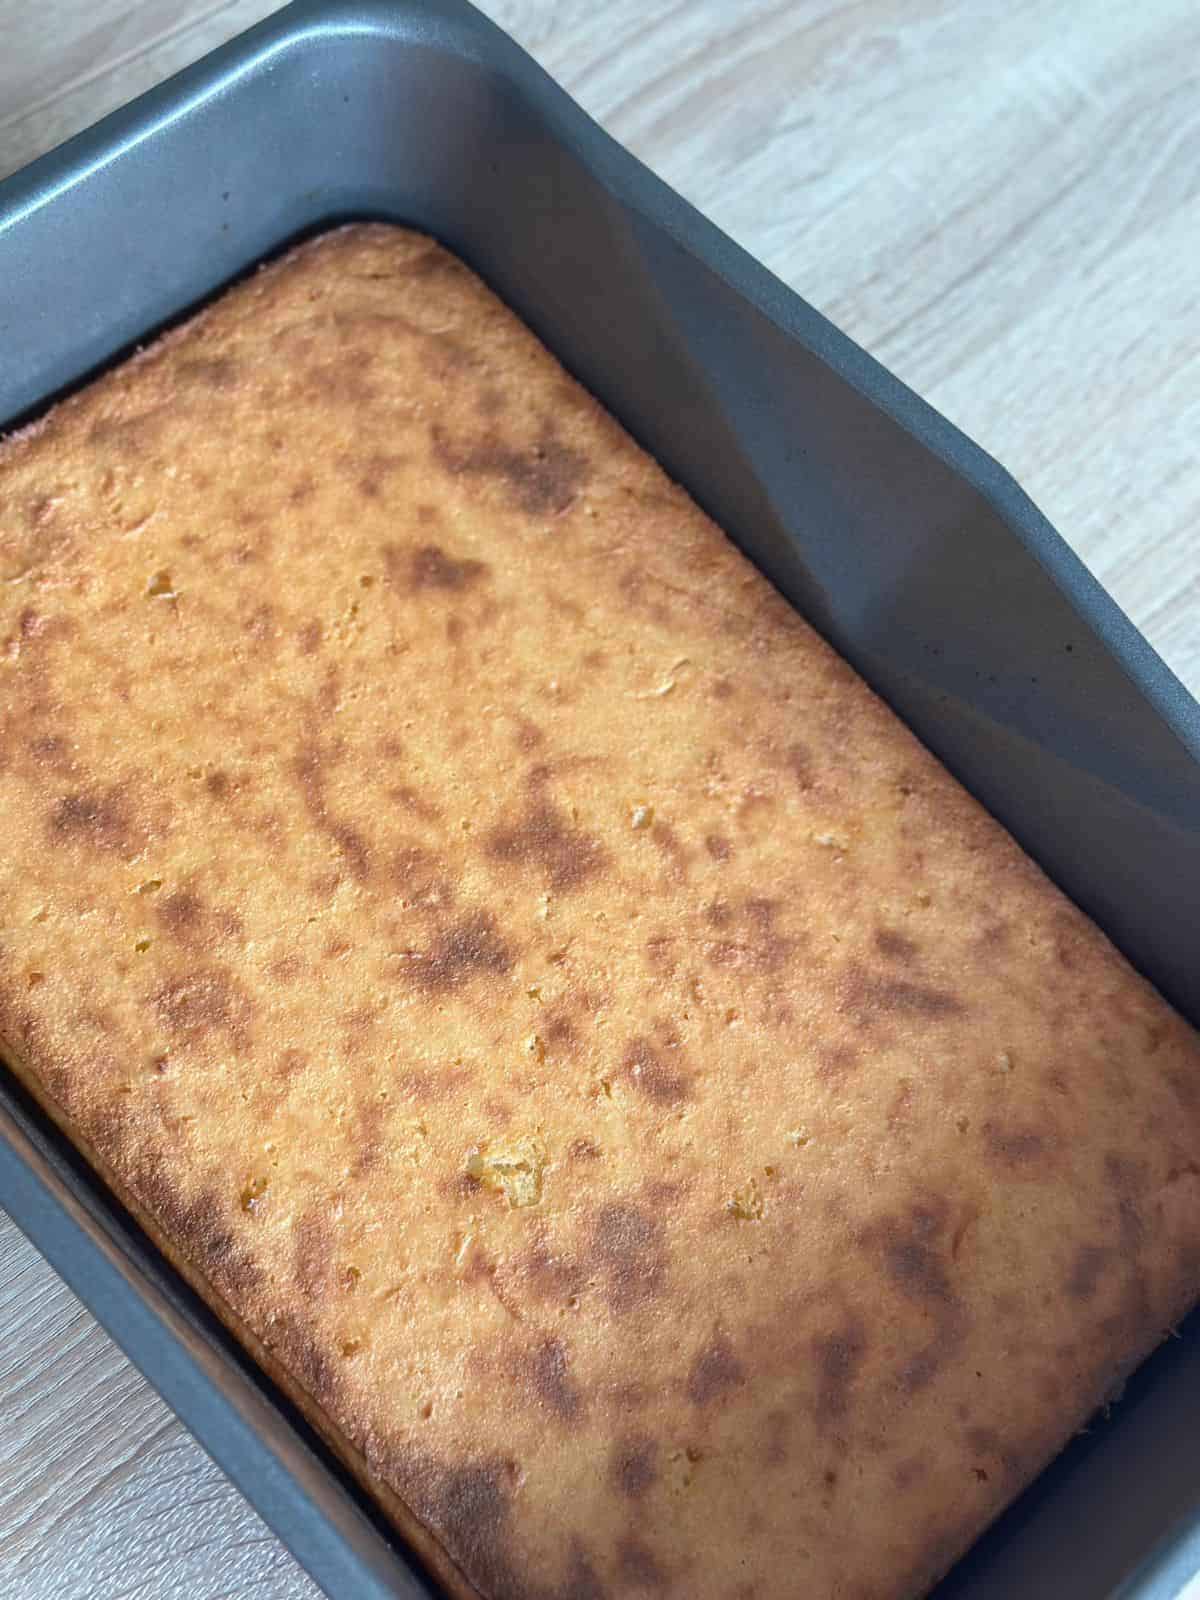
- Grease a nonstick pan with butter and pour in the batter. Bake on the lowest oven rack for 50–60 minutes, until the edges are golden and a toothpick inserted in the center comes out clean.
Step 3: Broil for Color
- Move the pan to the top rack, increase the oven to 400°F (205°C), and broil for about 5 minutes until the top is golden. Watch closely to avoid burning.
Step 4: Cool and Cut
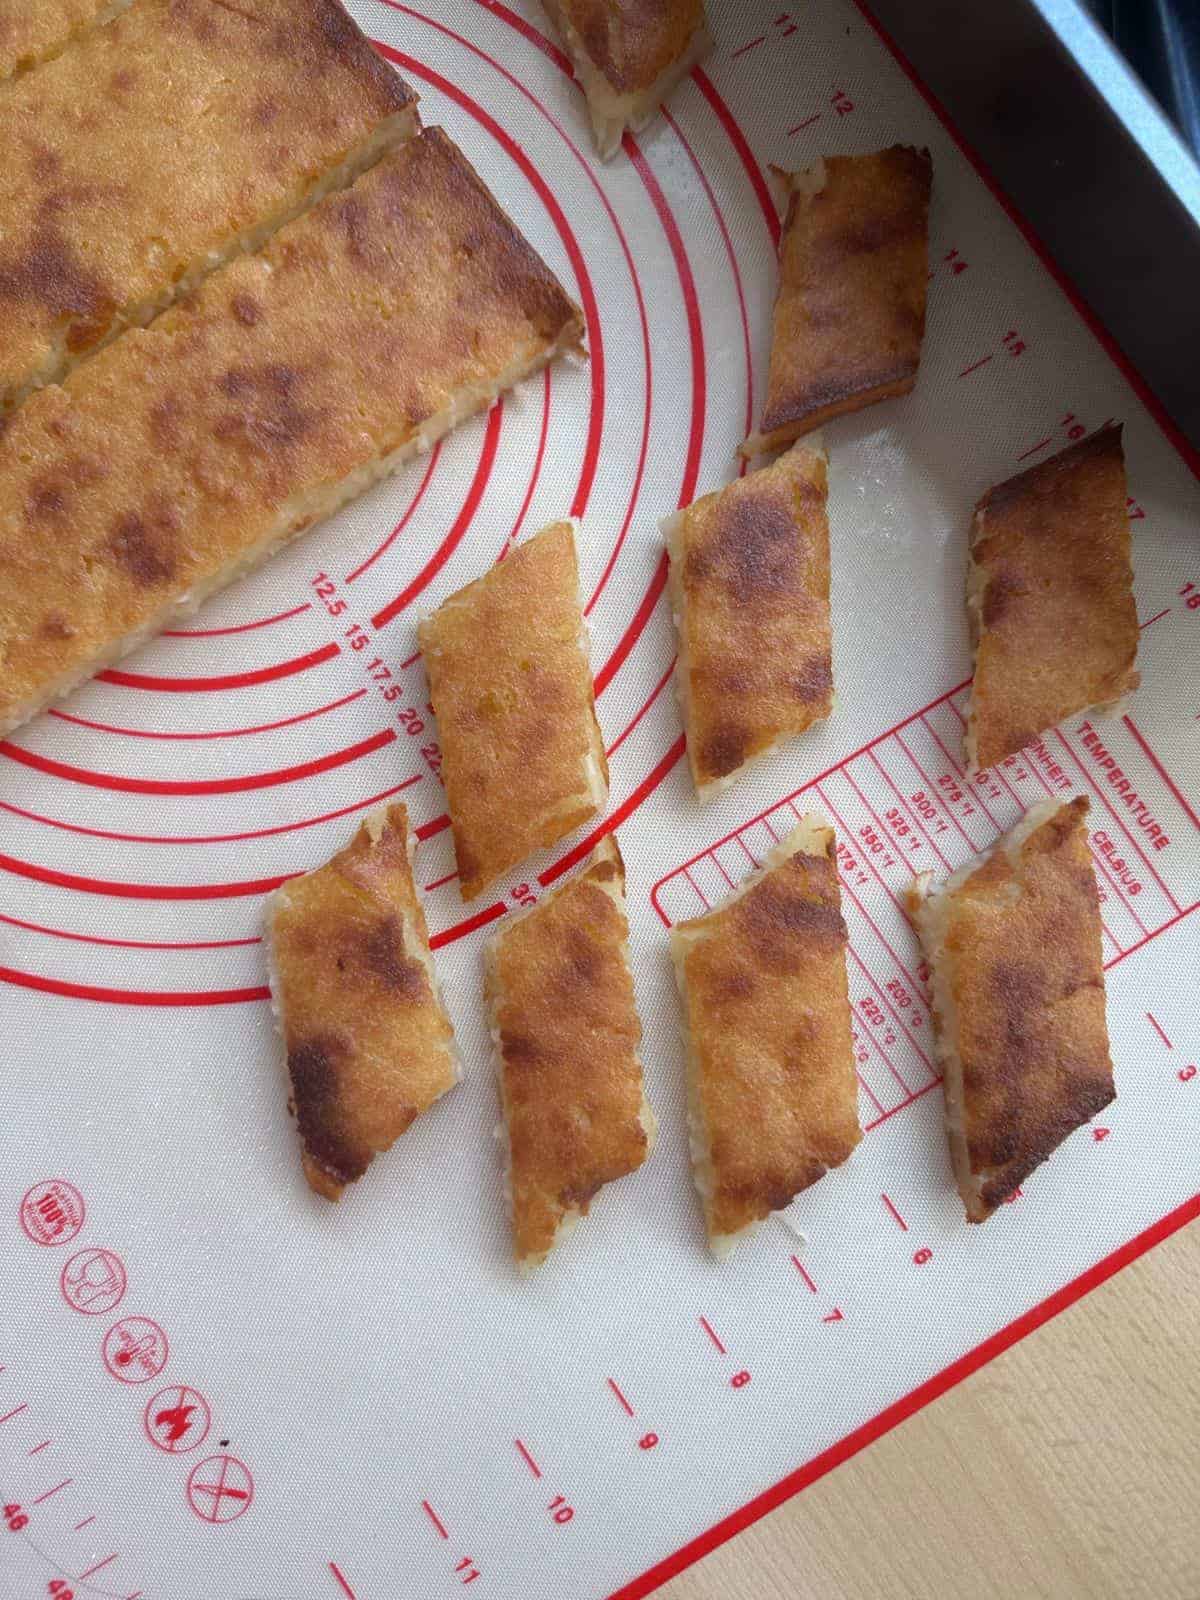
- Let the cake cool completely. Grease a knife with butter and cut into pieces before serving.

Expert Tips
Pan choice matters: I like using a large square or rectangular pan for Bánh Khoai Mì Nướng. The thinner the batter spreads, the crispier that golden crust will be—my favorite part!
Storing it right: This cake stays good at room temperature for about a day. For longer storage, pop it in the fridge (up to 3 days) or the freezer (up to 3 months). Just warm it up before serving—it tastes almost like it’s fresh out of the oven.
Vegan-friendly swaps: Want a plant-based version? Use vegan condensed milk and vegan butter. It’s just as rich and coconutty!
Serving idea: Enjoy it with a classic Vietnamese drink like egg coffee, salted coffee, corn milk, or avocado smoothie.
More Vietnamese bánh desserts
Pandan Waffle (Bánh Kẹp Lá Dứa)
Pandan Chiffon Cake (Bánh Bông Lan Lá Dứa)
Vietnamese Steamed Cake (Bánh Da Lợn)
Vietnamese Steamed Banana Cake (Bánh Chuối Hấp)
Vietnamese Banana Bread Pudding (Bánh Chuối Nướng)
Vietnamese Mung Bean Cake (Bánh Đậu Xanh Nướng)
Pandan Honeycomb Cake (Bánh Bò Nướng)
Palm Sugar Honeycomb Cake (Bánh Bò Nướng Đường Thốt Nốt)
Vietnamese Cow Cake (Bánh Bò Hấp)
Vietnamese Flan (Bánh Flan)

Vietnamese Cassava Cake (Bánh Khoai Mì Nướng)
Equipment
- 1 large square or rectangular pan (mine measures 16" x 12" / 41 x 31 cm)
Ingredients
- 2 pound frozen grated Cassava (900g – 1kg)
- 1 can sweetened condensed milk (14oz or 400g)
- 1 can coconut milk (13.5oz or 400ml)
- 2 cup shredded coconut meat (160-170g)
- 1 sachet vanilla sugar (or 2 tsp vanilla extract)
- 2 tbsp tapioca starch
- 2 tbsp melted butter (30g)
- ¼ tsp salt
Instructions
Prepare the cassava batter:
- Start by thawing the frozen cassava. If your cassava has a high water content, you can gently squeeze out the extra moisture.
- In a large bowl, add the grated cassava, condensed milk, coconut milk, tapioca starch, melted butter, salt, and vanilla sugar. Combine thoroughly all ingredients. Add the coconut meat and mix well.
- Let the batter sit for 15-30 minutes. During waiting, preheat your oven to 375°F (190°C).
Bake the cassava cake:
- Grease a nonstick pan with butter. Pour the batter into the pan.
- Bake the cassava cake for about 50 – 60 minutes on the lowest oven rack.
- After 50 minutes, check if the edges of the cake have turned golden brown. To check if it's fully cooked, insert a wooden toothpick into the center of the cake. If it comes out clean, the cake is ready.
- Now, move your cake to the top oven rack. Raise the oven temperature to 400°F (205°C) and broil for about 5 minutes, or until the center of the cake get a golden hue. Keep a close eye on this period.
Serve:
- Once the cassava cake is done, let it cool completely.
- Use a knife to cut the cake into parallelogram-shaped pieces. It would be a bit sticky so you could grease the knife with some butter before cutting.

Hey kann man auch Maniokmehl verwenden und wenn ja wie viel? Auch einfach 1kg?
Ich habe noch nie versucht, diesen Kuchen mit Maniokmehl zu backen. Maniokmehl hat einen geringeren Wassergehalt als gefrorener Maniok, daher empfehle ich, 600-700 g Maniokmehl zu verwenden. Nach dem Mischen kannst du mehr hinzufügen, um die auf meinem Foto gezeigte Teigkonsistenz zu erreichen.
Danke dir erstmal für die schnelle und hilfreiche Antwort. Glaubst du, es macht geschmacklich einen Unterschied?
Ich bin ziemlich sicher, dass der Kuchen besser wird, wenn man gefrorenen Maniok verwendet, da wir in Vietnam entweder gefrorenen oder frischen Maniok für diesen Kuchen benutzen :).
Ich würde den gefrorenen Maniok bestellen. Kann ich den ein paar Tage noch im Gefrierfach lassen, bevor ich den verwerte?
Ja, du kannst gefrorenen Maniok mehrere Monate im Gefrierschrank aufbewahren.
Okay danke und dann hätte ich noch ein paar Fragen:
Muss man Maniokstärke verwenden oder geht auch einfache Speisestärke oder eine andere Stärke aus dem Supermarkt? Und wie lange lässt du den Kuchen abkühlen?
Alle Arten von Speise- und Kartoffelstärke sowie Mehl eignen sich gut für dieses Rezept :).
Achso und kann ich auch Kokosraspeln anstatt geschreddertes Kokosfleisch verwenden?
Kokosraspeln sind wesentlich trockener als Kokosnussfleisch. Du musst zwar mehr Flüssigkeit hinzufügen, aber du kannst den Kuchen auch ohne Kokosnussfleisch zubereiten.
Danke und wie lange lässt du den Kuchen abkühlen?
Du könntest den Kuchen für 3-4 Stunden bei Raumtemperatur stehen lassen, um ihn abzukühlen. Danach könntest du ihn für 5 Tage im Kühlschrank aufbewahren.
Omg so lange 😮
Aber ja gut, wenn du das sagst wird es wohl stimmen 🙂
Omg so lange 😮
Aber ja gut, wenn du das sagst, wird es wohl stimmen:)
Echt so lange? 😮
Und wie lange dauert es, bis der Maniok aufgetaut ist?
Echt so lange? 😮
Aber wird schon stimmen, wenn du das sagst 🙂
Und wie lange braucht der Maniok, um aufzutauen?
Echt so lange? 😮 Aber wird schon stimmen, wenn du das sagst 🙂
Wie lange braucht der Maniok, um aufzutauen? Und den Ofen auf Umluft oder Ober/Unterhitze einstellen?
Der Maniok wird wahrscheinlich 1-2 Stunden benötigen, um vollständig aufzutauen. Verwende zum Backen des Kuchens Ober- und Unterhitze (ohne Umluft). Am Ende den Kuchen nur noch mit Oberhitze überbacken :).
Dankeschön und eine letzte Frage noch: Welche Backform benutzt du? Also wie groß ist die oder vlt. kannst du einen Link hier einfügen:)
Du bist immer willkommen. Die Größe meiner Backform beträgt 40*30 cm. Meine Backform gehört zu den stapelbaren Backformen von MasterClass (der erste Link), aber sie sind derzeit nicht im Angebot. Alternativ kannst du die 40*30 cm Backform über den zweiten Link kaufen 🙂 (beide sind Affiliate-Links).
MasterClass Backformen: https://amzn.to/4bYXh32
40*30 Backformen: https://amzn.to/49Bvynw
Danke dir. Und müssen die Stücke dann parallelogrammförmig sein?
In Vietnam schneiden wir den Kuchen oft auf diese Weise, aber es ist nicht erforderlich, ihn in ein Parallelogramm zu schneiden. 🙂
Alles klar. Stellst du den Kuchen auf ein Backblech oder Rost?
Ich ließ es auf dem Backblech abkühlen :).
Gibt es zu der Tapiokastärke eine Alternative und ja wenn welche?
Du könntest stattdessen Kartoffelstärke, Maisstärke oder Mehl verwenden.