Chocolate Dorayaki is a tasty variation of the traditional Japanese Dorayaki (or Dora Cakes). Instead of the typical sweet adzuki bean paste, it features a delightful chocolate sandwiched between two patties of Chocolate-flavored pancakes. It’s soft, full of chocolate flavor, pretty easy to make and even simpler if you use store-bought Nutella as the filling. It’s an ideal treat for any chocolate enthusiasts!

Different from my recipe for traditional Dora Cakes with the Chiffon method, I created Chocolate Dorayaki with the Muffin method, making it even easier to handle. However, due to the muffin method, the cakes may not retain their softness for a long time. Nevertheless, they are incredibly delicious and tend to be devoured within a single day.
🍫 Ingredients for Chocolate Dorayaki

- Eggs: I used 2 medium-sized eggs in this recipe. If your eggs are different in size, you may need to adjust the amount of water you add to the batter later.
- All-purpose flour: Remember to sift it along with cocoa powder and baking powder to avoid any lumps.
- Cocoa powder: This is the main ingredient that provides the chocolate flavor to the batter.
- Granulated sugar: I always prefer my sweet recipes to have a moderate level of sweetness, so I used just enough sugar to make my dorayaki slightly sweet. Remember, the Nutella filling is already sweetened.
- Honey: Dorayaki wouldn’t be complete without the sweet flavor of honey or mirin. In this recipe, I opted for honey as it’s more readily available for everyone.
- Baking Powder: The quantity of baking powder is crucial, so don’t forget to check it before using.
- Vanilla extract: Adds a hint of vanilla flavor to enhance the overall taste.
- Water: It helps in adjusting the consistency of the batter.
- Cooking oil: You won’t need a lot of cooking oil if you have a good nonstick pan.
🌟 Tips for making uniform Dorayaki:

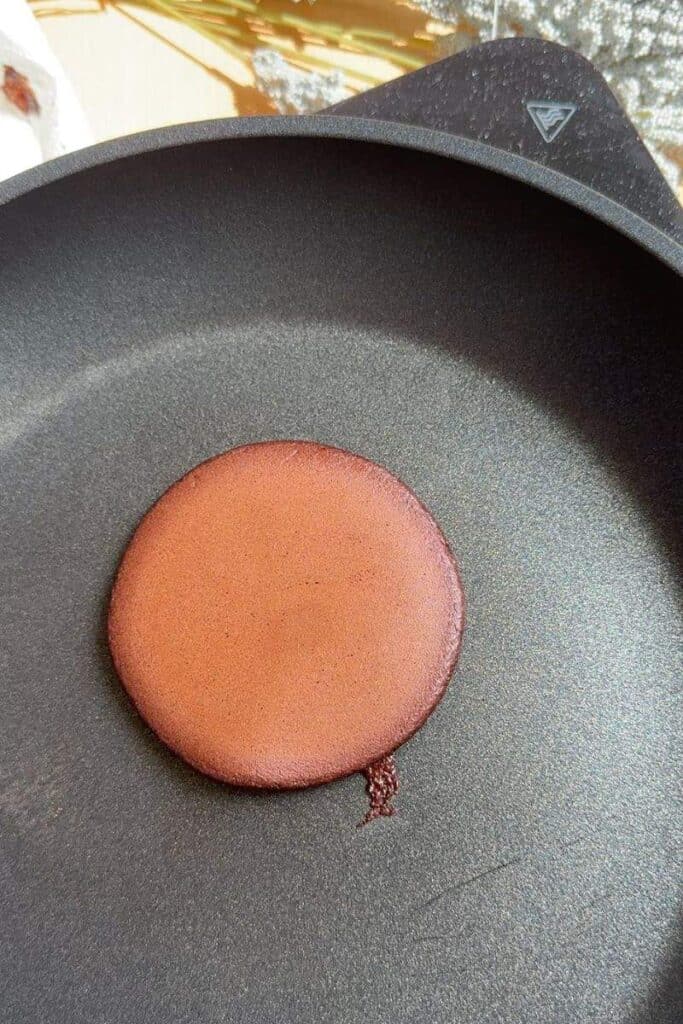
To make perfectly even dorayaki, it’s important to ensure that your pancakes are the same size. The best way to achieve this is by using a single tool for measuring and dropping the batter consistently. I recommend using a tablespoon for this purpose. Fill the ladle with 2 tablespoons of batter, then drop it from a height of 10 cm. This technique will help you create evenly round and perfectly-sized dorayaki pancakes.
❤️ Options for Chocolate Dorayaki Fillings:
If you enjoy a chocolate-flavored filling and are short on time, Nutella is a great choice. Alternatively, you can opt for chocolate ganache or chocolate pastry cream, which are equally delicious options.
🫙 Storing Chocolate Dorayaki:

To keep your chocolate dorayaki soft, you can store them in an airtight container at room temperature for up to one or two days. It’s important to wrap them with plastic wrap or foil to prevent them from drying out.
📝 How to prepare Chocolate Dorayaki:
- In a bowl, combine eggs, sugar, vanilla extract and honey. You can either whisk them together or use a hand mixer.

- Sift the flour, cocoa powder, and baking powder into the batter. Mix everything until you achieve a smooth and lump-free texture (but don’t over-mix it).


- Cover the batter and let it rest for 20 minutes.
- After 20 minutes, add water to the batter and whisk well. Adjust the amount of water to reach the desired consistency. The dorayaki batter should be more liquid than traditional pancakes but thicker than crepes.

- Coat the surface of a pan with cooking oil. Use a paper towel to remove any excess oil. This step is crucial to achieve a uniform and golden color on one side of the pancake.
- When the stove is hot enough, set your stove to medium-low heat.
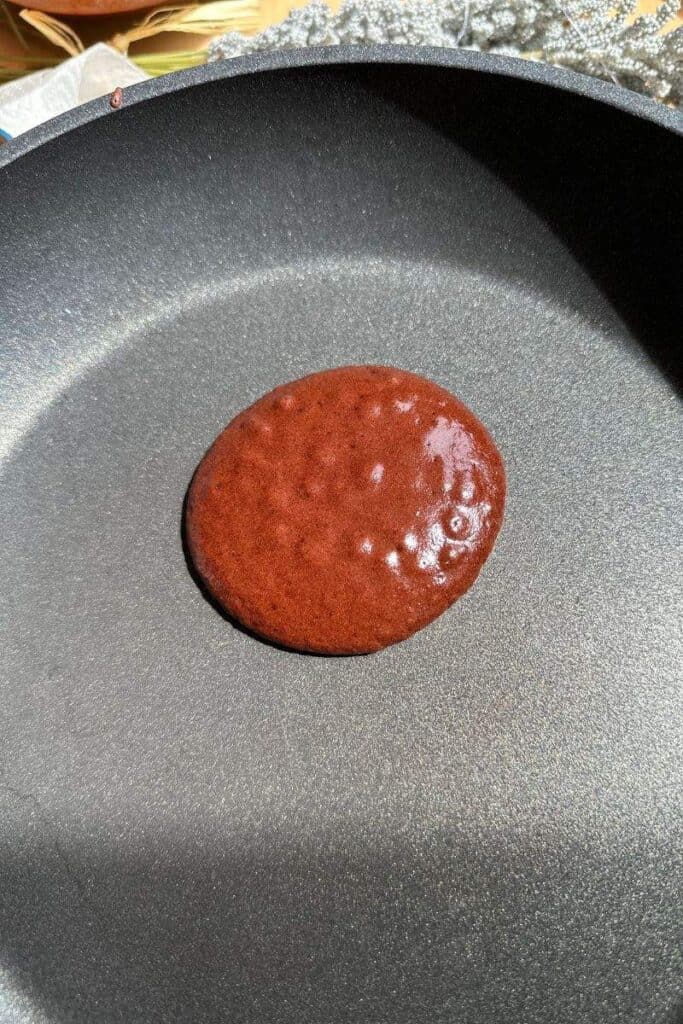
- Pour the batter onto the pan from a height of 10 cm, using the same amount of batter for each pancake (approximately 2 tablespoons for me). It’s important to make all the pancakes the same size.
- Allow the pancake to cook for 2 minutes until bubbles start appearing. Then, carefully flip it. Cook the other side of the pancake for around 30 seconds to 1 minute.


- Remove the pancake from the pan and let it cool down. Cover the cooked pancakes with plastic wrap to keep them moist.
- Once all the pancakes are cooked, place some Nutella onto the rough side of one pancake. Cover it with another pancake, creating a sandwich-like structure. Press the sides of both pancakes together to stick them.


If you’ve tried this recipe or any others from my blog, please share your creations with me on Instagram by tagging #savour_thepho or mentioning me in your stories with @savour_thepho . I would be thrilled to see what you’ve made and it would definitely brighten my day! Don’t forget to stay in touch with me on Instagram, Facebook, Pinterest, YouTube 🥰.

Chocolate Dorayaki with Nutella filling
Equipment
- 2 mixing bowl
- 1 Whisk
- 1 Sieve
Ingredients
- 2 Eggs (medium size)
- 100 g (½ cup + 2 tbsp) All-purpose Flour (I strongly suggest using a kitchen scale to measure all dry ingredients)
- 30 g (4 tbsp) Cocoa powder
- 70 g (0.35 cup) Granulated sugar
- 15 g (1 tbsp) Honey
- 1 tsp Baking powder
- 1 tsp Vanilla extract
- 65 ml (¼ cup +1 tsp) Water
Instructions
- In a bowl, combine eggs, sugar, vanilla extract, and honey. Whisk or use a hand mixer to blend them together.
- Sift the flour, cocoa powder, and baking powder into the batter. Mix until smooth and free of lumps (avoid over-mixing).
- Cover the batter and let it rest for around 20 minutes.
- After 20 minutes, add water to the batter and whisk well. Adjust the water amount for desired consistency (more liquid than pancakes but thicker than crepes).
- Coat the pan's surface with cooking oil, removing excess with a paper towel. This ensures a uniform, golden colored pancakes.
- Set the stove to medium-low heat once it's hot enough.
- Pour the batter onto the pan from a 10 cm height, using the same amount for each pancake (around 2 tablespoons).
- Cook the pancake for 2 minutes, then flip it when bubbles appear. Then, cook the other side for approximately 30 seconds to 1 minute.
- Remove the pancake from the pan and let it cool. Cover cooked pancakes with plastic wrap to keep them moist.
- Once all pancakes are cooked, spread Nutella on one pancake's rough side. Place another pancake on top, creating a sandwich. Press the sides together to stick them.


VERY TASTY!!! Even though it may take some time, they taste like restaurant’s ❤️
Thank you for your feedback ^_^. I’m glad that you like my recipe =).